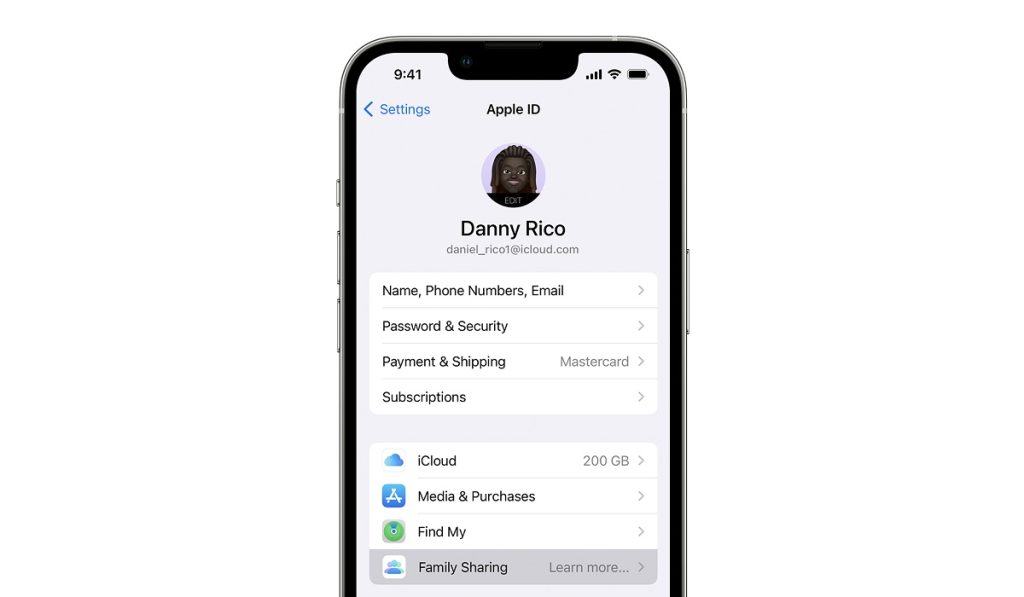
Family Sharing is by far one of the best features Apple has added to the iPhone in recent times. It is a great way to cut costs while giving up to six family members or/and friends access to a plethora of subscriptions. With Family Sharing you can either start a family group or join someone else’s family group. You can share music, movies, TV shows, apps, book subscriptions, iCloud+, and more without sharing an Apple ID. You can also share storage and other features like iCloud, Hide My Email, e.t.c.
Apple One allows you to bundle all these subscriptions together for one low monthly price. Subscriptions that you sign up for in the Apple Store can be shared too. You can set up Apple ID for kids, set up permissions remotely with screen time, and approve spending and downloads from a parent’s device with “Ask to buy.

When you share iCloud+, family members can’t see each other’s photos, files, or documents. And when you share other subscriptions like Apple Music, Apple Fitness+, or Apple TV+, each person sees their preferences and recommendations — not the whole family’s.
Table of Contents
How to start Family Sharing
The “Family organizer” can set up Family Sharing for the group from their iPhone, iPad, iPod touch, or Mac. When purchase sharing is turned on, the family organizer pays for the family members’ purchases and must have a valid payment method in file. To set this up;
•Go to Settings
•Tap on your name
•Tap Family Sharing, Select “Set up your family”
•Once you are done setting up, and have settled payment, you can begin to invite friends and/or family members.
For your Mac with macOS Ventura or later
If you have a Macbook with Mac OS Ventura and versions released after that, here is what you should do;
•Go to your Apple menu
•Go to your System Settings, then click Family.
•The Set Up Family button is on the lower right after you click Family.
•Tap “Set Up Family”.
For your Mac with macOS Monterey or earlier
•Go to your Apple menu
•Then to System Preferences, then click Family Sharing.
•Confirm the Apple ID that you want to use for Family Sharing, and ensure that “Share My Purchases” is selected.
How to invite family members and friends
You can add friends and family members through email, Messages, or even in person. To do this;
•Head to your Settings
•Tap Family/Family Sharing, depending on your iOS version.
•Then tap “Add Member”.
•If you want to set up an Apple ID for your child, select ” Create an Account for a child”. If your child already has an Apple ID, tap on “Invite People”
On your Mac with macOS Ventura or later
•Go to your Apple menu
•Then select System Settings.
•Tap on Family.
•Tap on “Add Member”
The Add Member button is below the list of your current family members.
On your Mac with macOS Monterey or earlier
•Go to your Apple menu
•Then to System Preferences.
•Tap on Family Sharing.
•Select “Add Family Member”, then follow the onscreen instructions.
How to Join a Family Group
To join a family group you have been invited or added to, simply Accept or decline on your device. When the invitation is sent, you will receive it via email or text message. You can also be a part of only one family at a time. If you do not get the invite through messages or an email, do this;
•Go to your Settings
•Tap on your name
•Tap invitations and simply accept
For your Mac with macOS Ventura or later
•Go to your Apple menu, then your System Settings.
•Select Family.
•Simply accept the invite.
When you join a family, you might be asked to confirm your account information and to opt into any features or services your family set up.
For your Mac with macOS Monterey or earlier
•Go to your Apple menu.
•Select System Preferences.
•Tap on Family Sharing.
•Accept the invitation.
With that, you are locked, loaded, and ready for all the Family Sharing fun.