Your Android phone’s accelerometer can determine the phone’s orientation and automatically rotate the screen to portrait or landscape mode. With Android, however, auto-rotate can stop operating as it should sometimes.
Usually, this problem results from the option being merely disabled. In other cases, a malfunctioning sensor, conflicting third-party software, or problems with the firmware of the phone may be to blame. Regardless of the cause, we’ll walk you through a few simple solutions to fix auto-rotate not working on your Android phone.

Table of Contents
How Can I Fix Auto-Rotate Not Working on Android?
If your Android phone’s auto-rotate function stops working, there are several things you could try to fix it. Below are some helpful options to fix auto-rotate not working on an Android:
Enable Auto-Rotate in Settings
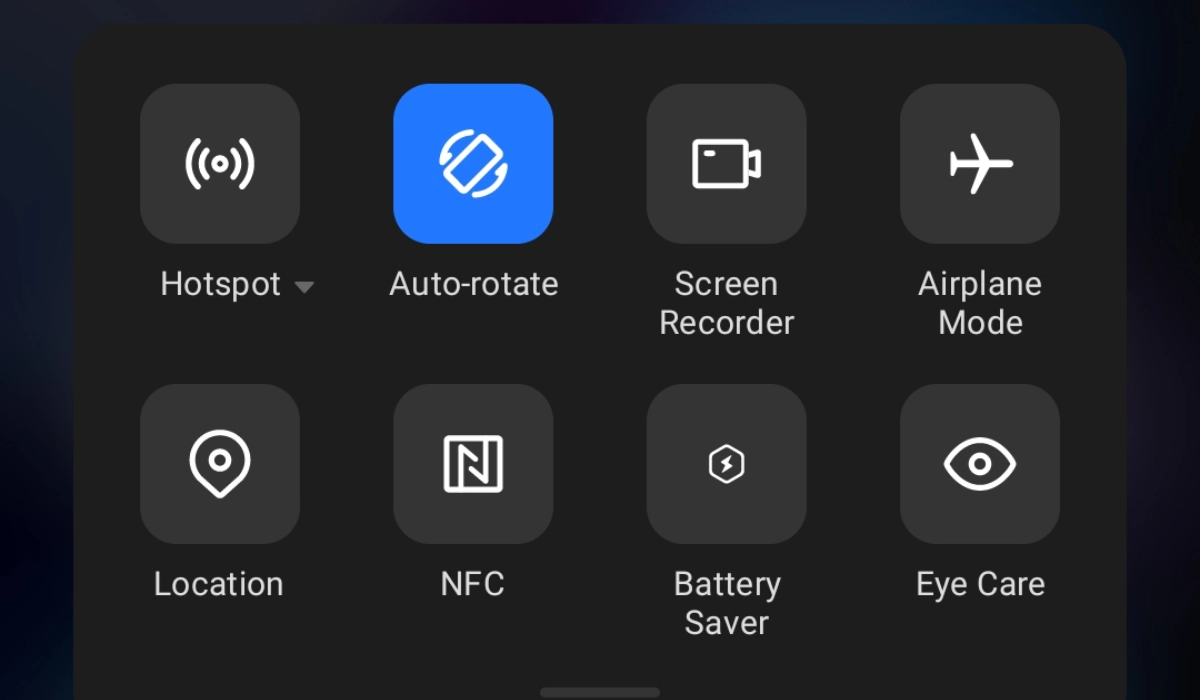
An auto-rotate feature is already incorporated into your Android phone, and it may be off. So, to fix auto-rotate not working on your Android, go to the Quick Settings panel. You can use the switch you find there to lock your display in a specific orientation or to activate or disable rotation.
Look through these settings to see if you or someone else made any changes, and if required, enable the feature to repair auto-rotate on your device. Follow these steps to enable auto-rotate on Android:
- To view the Quick Settings panel, scroll down from your screen’s top.
- Find and hit the Auto-rotate icon here. Depending on the phone you’re using, it will appear differently; on Samsung phones, the symbol will either say “Portrait” or “Landscape” based on your current screen orientation.
The auto-rotate function should start working as soon as you switch it on following the steps above.
Restart your Device
Restarting your Android phone is the next most popular option to fix auto-rotate not working on an Android. Any temporary issues blocking one or more system functions from operating can be resolved with a short restart.
Press and hold down the Power button to restart your phone. Tap Restart after that, then confirm your choice by clicking Restart again. After the restart is complete, check to see if auto-rotate works well again on your Android.
Look Out for App-Specific Issues or Third-Party App Conflicts
Auto-rotate sometimes loses its functionality for a certain app. For instance, the Android version of the YouTube app frequently has problems detecting phone orientation. However, newer upgrades of the app can help fix auto-rotate not working, especially if it’s a widespread problem.
You should also check if there is an app conflict especially if you installed a lot of apps recently. Certain applications can interfere with your phone’s settings including the auto-rotate function.
To determine if the problem is fixed, try uninstalling the most current apps and restarting your phone. You should also check to see whether you have auto-rotate turned off for specific apps.
Use a Third-Party App
For smartphones with a partially functional display, a rotation control app can be useful to fix auto-rotate not working on an Android. If the top portion of the mobile display is broken and you can’t reach Quick Settings, such apps can be helpful. They’ll also work as an alternative to Android’s auto-rotate function.
With over five million downloads, Control Screen Rotation is a well-liked rotation control app for Android. You can manually adjust the screen orientation or have it shift based on sensor orientation. The notification panel also has a useful overlay function that allows you to modify the screen orientation. The app is simple enough to use. Here’s how:
- Launch the app, then select Start service.
- Set the option to “Choose screen orientation” to “Sensor orientation”
- Turn on the “Add a button to the notification for stopping service” switch to turn on the overlay.
In summary, try any of the above options to fix auto-rotate not working on your Android. You could also try a factory reset if nothing else works but remember to back up your device first.