When saving a file that has the same name as the existing one on your Mac, you will see a pop-up message prompting if you want to replace the original file with the new one. But sometimes, maybe you are moving a file in a hurry without paying attention to this warning, only to find that you have mistakenly replaced the file, causing your file to be overwritten.
So, is it possible to get the replaced file back? Yes, of course! As a matter of fact, the replaced or overwritten file is still stored on your Mac. When clicking the Replace button to overwrite the original file, you just get the file name, icon, or thumbnails deleted. Instead, the actual content remains on your Mac internal hard drive until another piece of data takes its place. Given this, you have time to recover replaced files on Mac but you need to take help from some tools, namely, Time Machine, Cloud backups, thirty-party data recovery software, and AutoSave.
Recover Replaced or Overwritten Files on Mac with Different Tools
1. Time Machine
As a versatile data backup and restoration tool, Time Machine enables you to make hourly, daily, or weekly backups as well as local snapshots on your Mac to prevent unexpected data loss. However, Time Machine can take effect only if this built-in tool is turned on before you mistakenly replaced the original file with the same name. If you have already had a Time Machine backup before the data overwrite occurs, Time Machine always comes in handy.
Step 1: Connect the external drive storing your Time Machine backup to your Mac computer.
Step 2: Open Finder to locate the folder that stores your overwritten file.
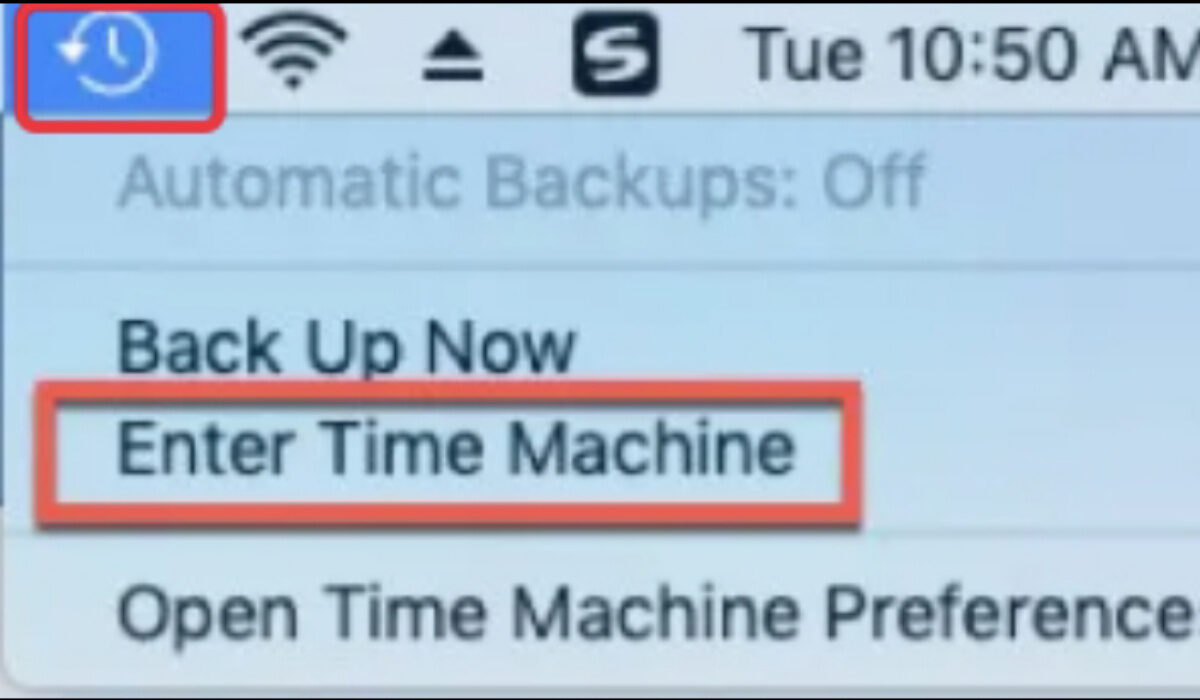
Step 3: Hit the Time Machine icon from the top menu, and then select Enter Time Machine from the drop-down list.
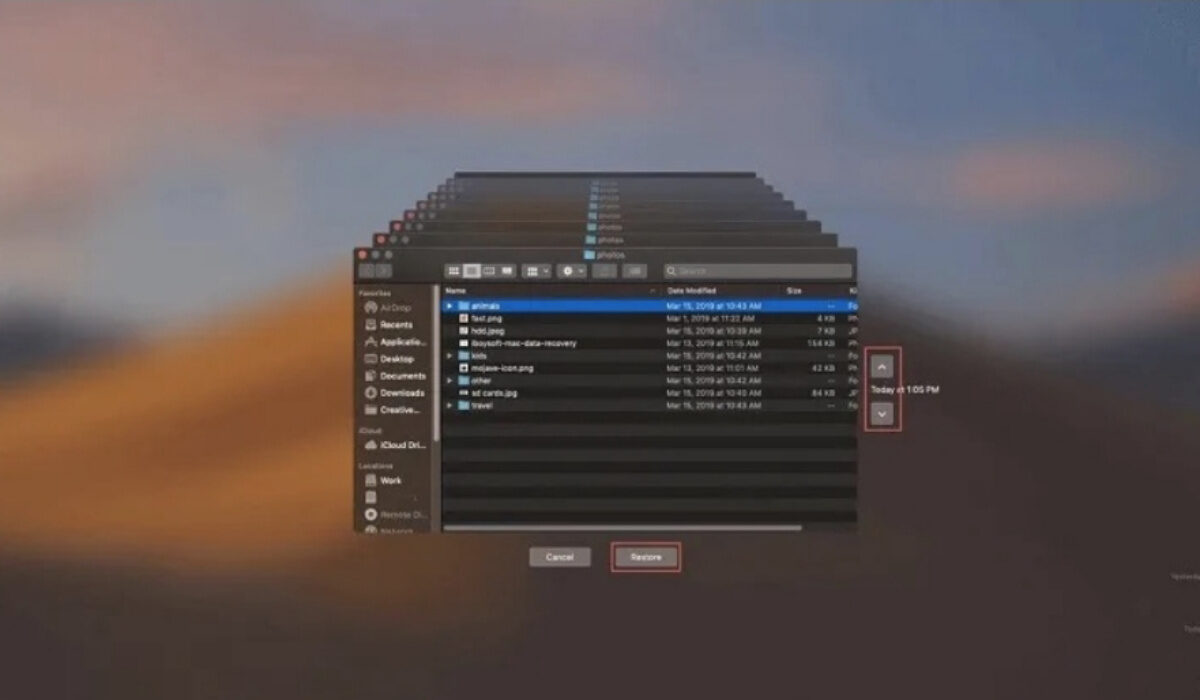
Step 4: Click the up arrow, the timeline to the right, or the previous version windows to go back to the time before the file was replaced and find the needed file.
Step 5: Select the file and click the Restore button to complete file restoration.
- Cloud Backups
Most Cloud backup tools can maintain history changes to files, allowing you to recover mistakenly replaced files from the history files, so such Cloud backup tools like iCloud, Dropbox, or Google Drive can be taken as a helpful alternative to Time Machine. Here, we will guide you on how to perform replaced file recovery on Mac using two different Cloud backups. One is iCloud and the other one is Dropbox. As long as you turned iCloud or Dropbox on to make a backup copy of your files regularly, you are able to restore the overwritten or replaced file to its original version.
To retrieve an overwritten file or a replaced file with iCloud:
Step 1: Open icloud.com using Google or other browsers and input your Apple ID to sign in to your iCloud account.
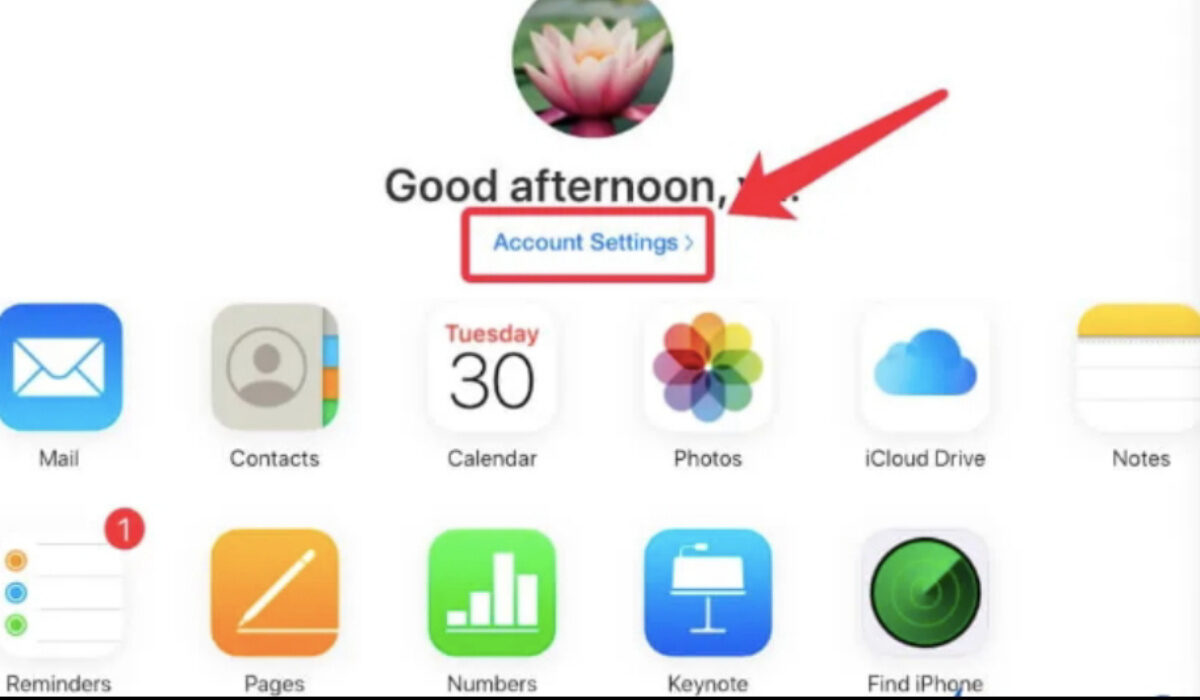
Step 2: Click Account Settings after a successful login.
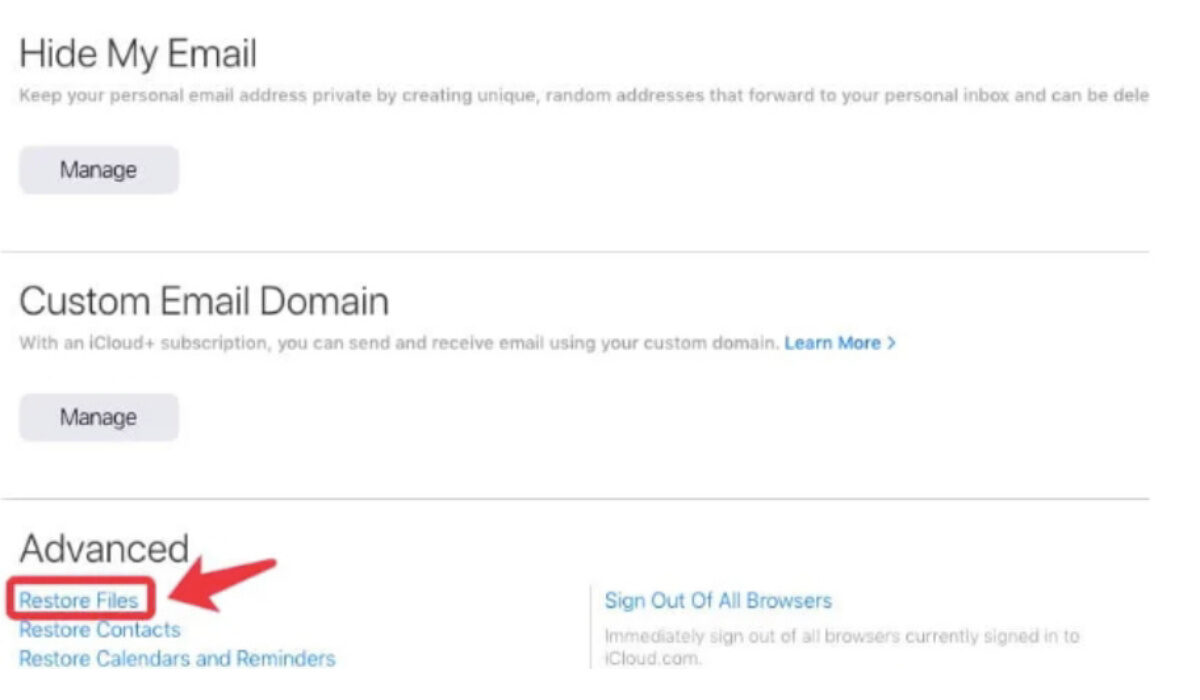
Step 3: Move to the bottom of the iCloud settings page, find and click Restore Files.
Step 4 Locate and tick the files you want to get back, and then hit the Restore button.
To retrieve an overwritten file or a replaced file with Dropbox:
Step 1: Go to dropbox.com to sign in to your Dropbox account.
Step 2: Select the folder that stored the replaced file. Alternatively, you can click All files to locate your target file.
Step 3: Tick the file you’d like to get back and then head to the three dots button > Version history to the right.
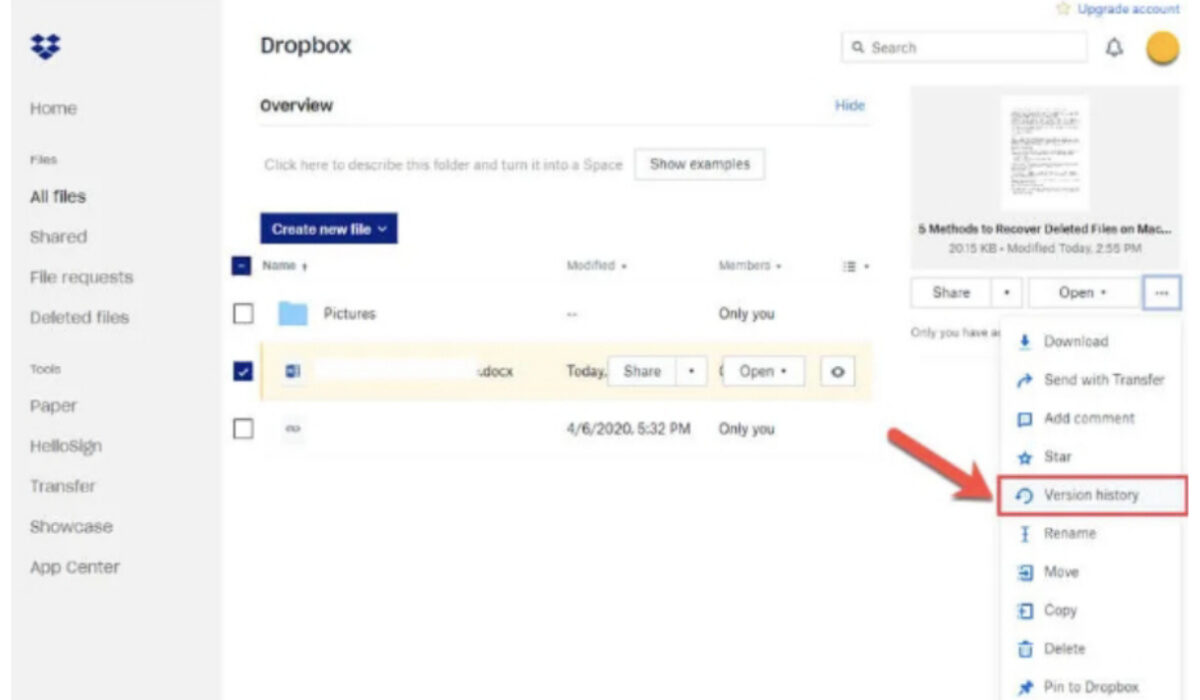
Step 4: Find the original file version you need and hit Restore.
- Third-party Data Recovery Software
Apart from Time Machine and Cloud backups, data recovery software can also be used as a workable utility to recover overwritten files. If you don’t develop a good habit of backing up files or never do so, data recovery software like iBoysoft Data Recovery for Mac will be a necessity.
As its name implies, iBoysoft Data Recovery for Mac is a file recovery program exclusive for Mac users. This application is equipped with advanced algorithms, which permit you to scan the entire Mac hard drive to find out the files that have been overwritten by new files and recover them in a quick and secure way.
Step 1: Go to the official website of this data recovery application to free download and install it on your Mac. If you are a new user that never installed this program before, you have to allow system extensions and enable Full Disk Access.
Step 2: Select the storage device where the overwritten files are situated after launching this software, and click the Search for Lost Data button to initiate disk scanning.
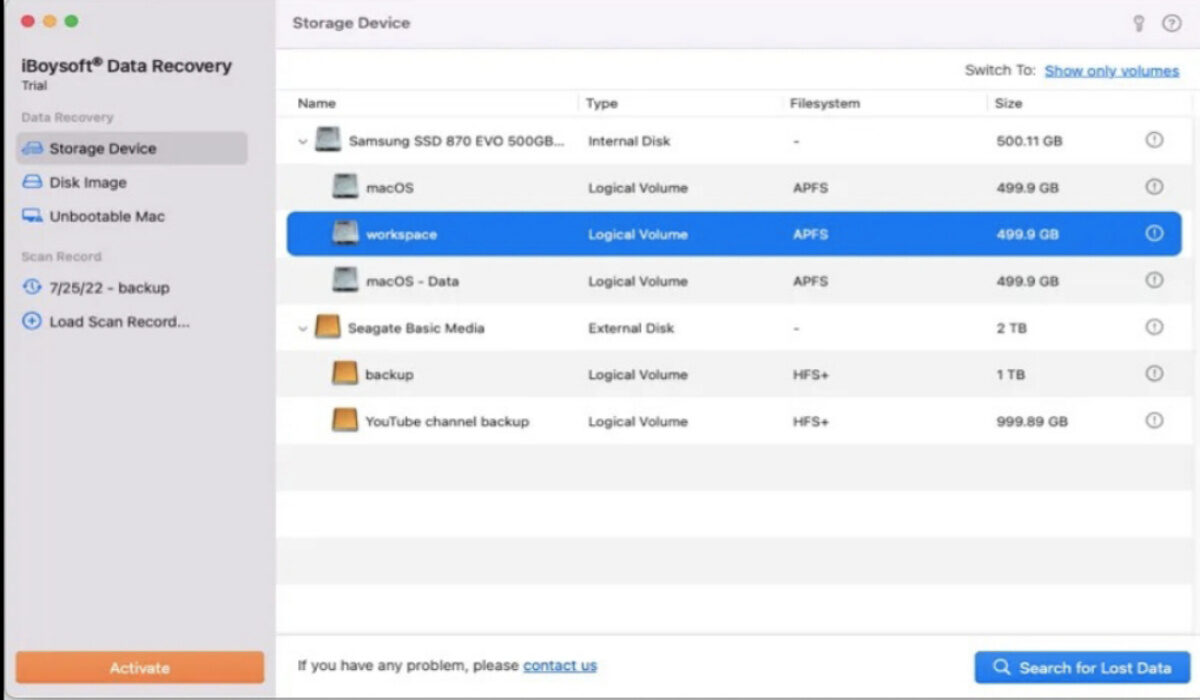
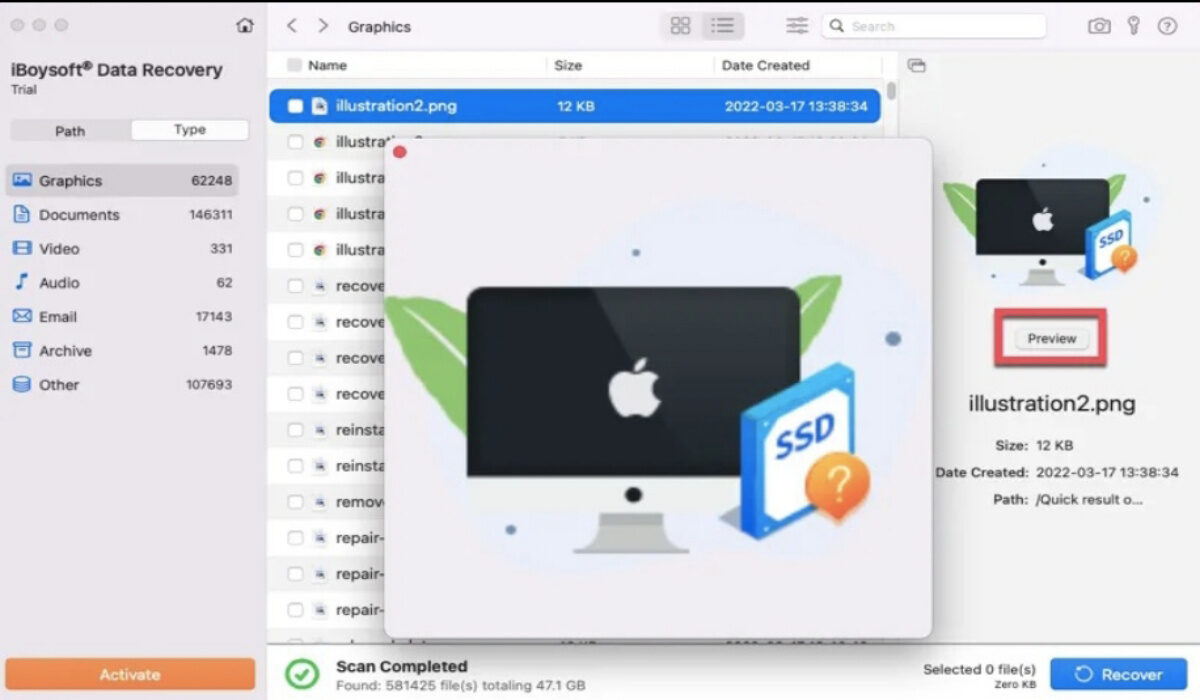
Step 3: Filter the scanning results to locate the replaced files you want, preview and tick them, and then click Recover to restore the overwritten files.
- AutoSave
Whether you are using a Windows PC or a Mac, you should know that there is a helpful feature called AutoSave available on both systems, helping you save your file automatically every few seconds when you do operations on the file, including opening, renaming, editing, saving a file, and more every time. Thus, you can try AutoSave to recover the files that are replaced.
Step 1: Open the new document that has taken the place of the existing one.
Step 2: Click the File menu from the top navigation bar and then go to Revert To > Browse All Versions.
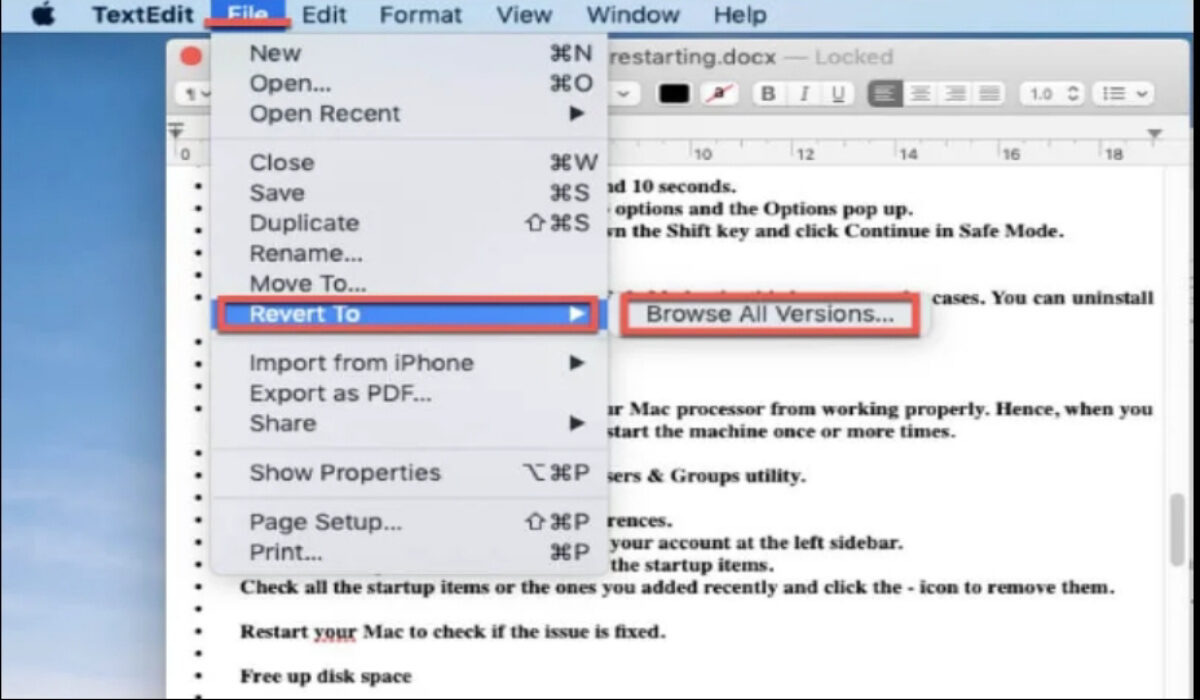
Step 3: Check the version history to select the original file version and click Recover to retrieve the overwritten files.
Final Words
In this article, we introduced four different ways to recover overwritten or replaced data on Mac. If you have Time Machine backups or Cloud backups, then you can get your overwritten files back with the help of Time Machine or the corresponding backup storage services. If not, third-party data recovery software iBoysoft Data Recovery for Mac should be your first choice.
- Don’t miss our mobile phone reviews.
- Follow our news on Google News.
- Join our WhatsApp Group, to be notified of the most important articles and deals,
- Follow us on Instagram, Facebook, Twitter, and YouTube.